What a Gem! This Week’s Favourite Finds

My dog has been sick recently… Let me tell you, it’s been a rough last few days! My sympathy was drawing thin… They tell me the messes we’ve managed are only a glimpse of what parenthood will be like. Yikes! We’re at least over the worst of it now… Which means it’s a perfect time for some inspiration for any projects you might have coming up this weekend.

1. This fireplace make-over:

{source}

I was initially drawn to the accent colours on the mantle, but the tiling was what won me over! I’ve read a few times that honeycomb is the new “it” pattern… Could it even be the new chevron? It’s definitely worth checking out the before and after shots at Retro Ranch Renovation.

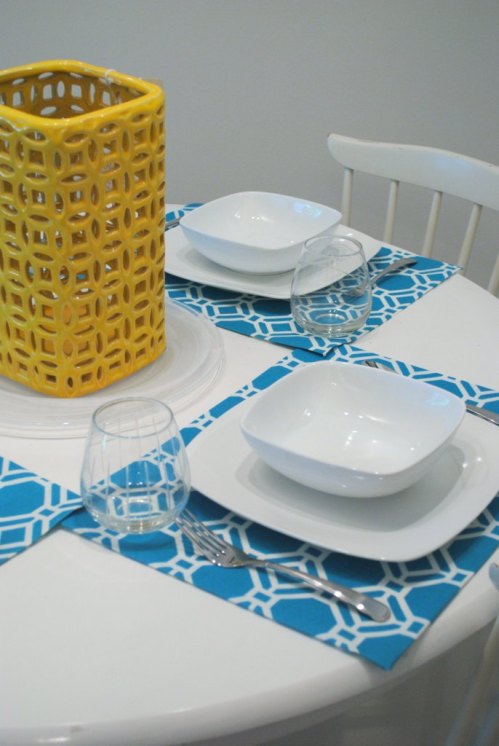
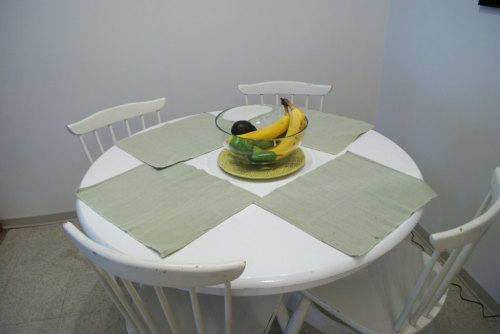
2. This mint and gold tablescape:

{source}

While I’m not a big fan of the colours in the flower arrangement in the background, I love the mint and gold! I discovered this one recently and was instantly attracted to it because it resembles the feel I’m going for in my new blog design (especially with the ombre turquoise and white table cloth). I’ll certainly be referring to it for inspiration for my final tweaks (again, I get obsessive over these things.) Thanks to all of you who have contributed to my plan this week! Can’t wait to unveil it all soon…

3. A faux marble DIY:

{source}

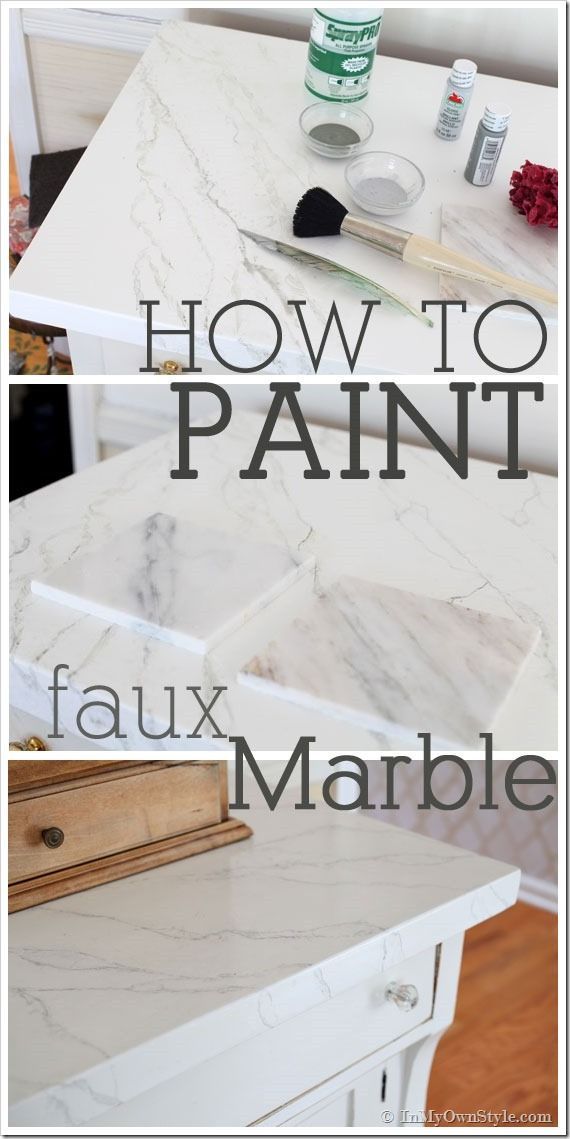
She literally managed to create the look of marble. At least in the photo, I can’t tell the difference at all. How amazing is that?

4. These easy DIY outdoor candle holders:

{source}

One of my all-time favourite blogs, I Heart Organizing just launched her latest Monthly Challenge, “The Great Outdoors”. Each month, she focuses on one area in the house to work on, be it organizing or decorating, and then finishes off the month with a link party. This might be just the push I need to tackle our little patio! Plus, she posted these little candle holders as inspiration. Aren’t they cute? I’m sure it would be an easy and cheap update to some thrift store glasses.

5. This KITCHEN.

I’m in love. Honestly, if I ever have the chance to design my own kitchen, this would be it. It’s so beautiful; I had to throw in two photos.

{source}

I love everything about it. The dark wood floors, the open shelving with a slightly rustic feel, the gleaming bin pulls, the shaker-style white cabinets, the crisp white subway tile…. Even the accessories like the pink peonies, the striped grey tea towel and clear glass baking jars. It reflects me to a tee!

I hope these finds inspired you this week. Be sure to check back Monday for my latest apartment updates…

May In a Nutshell

One great result of blogging about my home and our projects is that it keeps me accountable. I constantly have new ideas swimming about in my head, but this pushes me to create them. That being said, as a result of my blog, I also often find myself obsessing planning my next project… and honestly, not always feeling like our place measures up to my vision.

This doesn’t sit well with the little yogi in me. Instead of constantly thinking about the future, I also want to make a mental to note to enjoy what I have accomplished too! So once a month, for those of you who are new to my blog, or who may have missed a few posts, or for nothing other than reminding myself of what I have managed to get done, I’m going to recap the projects I tackled over the previous four weeks.

Here’s what I accomplished in May.

First up, I tackled yet another paper clutter source and created our 15 minute memo board:

Memo board 2

Don’t know how thrilled Shaun’s sister is to be featured in all these pictures… Thanks for being so easy going if you’re reading :)

In one weekend, I went a little crazy. Let me tell you, the rest of our house was in shambles. I finished off our temporary bathroom mirror frame

Temporary Mirror Frame

And created our entrance chevron wall!

Measure the distanceFinal Chevron

It might have been a crazy busy weekend, but the results are so worth it. I’m still deciding how I want to tie in the rest of the hallway accessories…

Next, I created our Home Tour! Check back to see how our home progresses.

More recently, we added some new shelving and updates in our bathroom:

Above door shelf

And this weekend I made some easy no-sew placemats to welcome in summer:

Table close up

I have quite a few ideas in mind for June, but what I’m most excited for… My (DIY-ed) new blog design! I’ve been wanting to update mine for a while, but it took me a while to decide on how. So many of you over at the Young House Love Forums were so helpful! I of course have some details to tweak, but you can expect to see a prettier blog in the coming weeks…

(There, I said it. Now it has to happen.)

I’m curious! How did you create your blog? Was it a template, designed for you, completely created from scratch? Always helpful to hear your stories :)

Pretty No-Sew Placemats

We had Shaun’s parents over Saturday for dinner. It was a really nice, low key, casual dinner (I made fish tacos and brownies if you’re curious… yum!). Shaun’s mum appreciates pretty tablescapes as much as I do, so I thought it would be the perfect occasion to make the placemats I had in mind!

Table close up

I like to have placemats to break up some of the white we have in the space. Love white furniture, but white walls, white table, white chairs, white dishes… not so much. My kitchen needed some contrast. We had been using some of Shaun’s old ones and they were looking a little… tired.

Place mats before

Last weekend I was at the fabric store looking for something to cover my pillows and found this great outdoor fabric. Great for pillows, but even better for placemats! Because it’s made for the outdoors, it’s water and stain resistant.

image

Here’s how I made them:

1. Using my existing mats as a guide, I cut out my fabric, leaving a bit of excess for the hem.

Use your mat as a guide

2. Creating a perfect parallel rectangle was the trickiest part of the project. Again, I used the mat as a guide to create a straight line and 90 degree angle.

Fold sides in sides for a hem

3. After I knew where the hem would be, I ironed each one down.

Iron edges

Tip: It was much easier to use a geometric pattern than a solid colour: I knew my line was straight by following the pattern.

4. Once I finished the sides, I tackled my corners.

Make the corners   

Based on the point where the folded edges intersect, I folded over the corner to create a triangle at a 45 degree angle.

Fold corners

From there, I had a perfect corner hem:

Final corner

5. Following the ironed hemline, I used Aleene’s Fabric tape (the same stuff I used to recover the inside of my jewelry box) to finish off the hems. It’s basically strong double sided tape, no ironing required!

Fabric tape hem

I finished four in less than two hours. Little more than I had anticipated, but the straight lines are worth it!

Finished place mat

Don’t they add a nice pop of colour?New place mats

I especially love how the square lines in the geometric pattern, the dishes and in my yellow hurricane (pot? pottery? What would you call that?) compliment the rounded ones of the table, chairs and pottery in my photo. Plus, the turquoise mats echo the turquoise in the picture!

Set table 2

Total costs for this project:

Fabric tape: Free, since I had some leftover.

Fabric: It was 50% off, so 8 dollars a meter. I only used about half of that, so each mat worked out to about a dollar each.

Total: $4. Cheap cheap cheap!

Table close up

What have you added recently to welcome in summer?

I’m linking up with

Reasons to Skip the Housework